Showing posts with label Babylock Embellisher. Show all posts

Monday, October 14, 2013

It's Trickier Than It Looks

Using an embellisher (needle-felting machine), that is.  I played around with it on Friday afternoon, with B&L's "Embellish and Enrich" at my elbow.  Jan and Jean (if I may be so bold to call them by their given names, when we haven't even met!) fill their booklets with ideas and inspiration, rather than strict instruction, so trying to follow through and create some of their examples is a bit of a challenge all on its own.  Add in a roaring machine equipped with 12 barbed needles and...well...!

First I played with acrylic felt and made a couple of samples that mirrored the book's:

Felt shapes on felt
Square & triangle are felted wool bat
Exes are acrylic felt
Felt on felt -- from front to back
and back to front -- to blend colours

A little 3D - felted bat, felted to fabric
Then I moved on to playing with sheers.  This sample is of a sheer felted to a synthetic, somewhat "shiny" white fabric.  Both are scraps given me years ago by a client who is a draper and upholsterer.  The sheers taught me about the power of my machine's 12 needles -- for I broke not one, but two!  It seemed I'd been going too fast and perhaps pulling the fabric against the needle tips, for it was only the tips that broke.

Oops!

Following my instruction booklet, I got the needle cover off, and loosened the screw that holds the container for the needles.  You have to take it out of the machine in order to remove and replace needles.  The instructions were unclear on exactly how to remove it so I called my trusty dealer, and Judy walked me through the process.  We talked about the power of the machine and how 12 needles really distress and distort the fabric quickly.  She suggested I not use all 12.  Who'dda thunk it?  So I took out the 2 broken ones and one other, so that I was down to 9 -- or 75% capacity.  Much better drive the next time out!

And I really like how the sheer fabric puckers and folds -- and how the felted folds look.  There's potential here:


I played a bit more yesterday afternoon with sheers on sheers, and a single layer of sheers, but have taken no photos of those samples because there wasn't a great deal going on.

Pieced Panels

My brain became a bit overloaded with the results to date, so I took a break Saturday and part of yesterday afternoon to work on the piece I'm calling The Door Quilt -- for want of a better title at the moment.  It's for an old, drafty door in our parish church, and consists of pieced panels in the colours of the liturgical calendar.  

These panels have been sewn together
and will go across the top of the piece
~ 42" wide by 20" long
Green panel #1
~ 22" W x 55" L

Green panel #2
~ 22" W x 55" L

The green panels will be quilted separately and then attached, side by side.  This pair will then be attached across the top by the quilted blue/purple and red panels.

Overlaid on this quilted background will be a large motif...The finished size of the piece is expected to be 38" W x 72" long -- you can see I've built in extra width, which will be trimmed away as the piece takes shape.

Having just washed the backing fabric for all three sections, this afternoon's work consists of sandwiching the top section and perhaps beginning to quilt.

But for now?  A good long jog in the mid-day autumn sunshine.

Happy Thanksgiving!

Friday, October 11, 2013

I Don't Know Where to Begin

Last weekend in Edmonton I collected suggestions (and 'no thank-yous') re: Christmas gifts.  Thankfully, one of my own gift ideas is already under construction.  Yesterday I bought yarn for another...and photographed yarn for a third, sending the photos off just a few moments ago.  Patterns for all have been purchased.

Also last week I posted goals for the current Visioning Year.  I've been part of the SAQA Visioning Project since its inception as a wiki on the old SAQA website.  Now it carries on as two blogs -- for VP members only.  It's a place where participants set goals, check in regularly (or not so regularly!), post photos of process and progress, exchange information and gather feedback.  Right now, I'm working on short-term goals -- finishing "Posh Poppies" and The Door Quilt (for lack of a better title), for example.

Then there's the goal I set about continuing to make time each week for new learning, beginning with my new embellisher (needle felting machine) and Double Trouble's inspiring book, "Embellish and Enrich".  I've decided the best way to focus and learn is to work through it from cover to cover.

I awoke this morning with "wool-gathering" sitting at the forefront of my thoughts.  As I lay in bed, ideas crept in...about abstracts and wee landscapes and florals, mounted in shadow boxes.  The beginnings of a new line of textile exploration and creation...

My friend C is about to arrive for lunch.  It's been ages since we've hit the Whistle-stop Cafe for their yummy Friday chowder, the perfect reward for a walk in the brisk autumn air.

I'll figure out where to begin -- later.

A weak link to Off the Wall Friday, indeed -- but definitely appropriate to the topic!


Tuesday, July 09, 2013

Summer School 2013 - Part II

My current challenge, as a member of 15 x 15, is a piece with the theme "Texture".   Definite a wide open field, eh?!

"Texture is the surface and tactile quality of an object," writes Ann Johnston in The Quilter's Book of Design.  She points out that embellishments (beads, buttons, embroidry), techniques (such as folding, ruching, gathering, applique and the actual quilting) and fabric selection can all bring texture to a quilted piece.  Sometimes the fabric just looks textured because of the way it's printed.  Ms. Johnston refers to this illusion of texture as 'visual texture', a distinction I find useful when thinking about this entire notion.

Over the last ten days or so, I've been researching this topic, working in my sketchbook and experimenting with both transfer paints and my embellisher (felting machine) to make samples and work out my piece.

Those of you who've followed this blog for the last while are undoubtedly aware of my fondness for trees -- particularly the aspen that grow all over the place near my home.  Tree bark is wonderfully textured, so when the theme was announced I quickly decided to see if I could render bark in fabric and stitch.

While the bark of aspen is interesting and plentiful nearby, I decided for this piece to stay closer to home, and took photos of both a fungi-encrusted mountain ash (aka rowan for you folks in the UK) and an old ornamental fruit tree, both in my back yard.  Here are a couple of examples:

Fungi on My Mountain Ash
Aging Bark - Ornamental Fruit Tree
I've several more, and each one is interesting.  Turning to Beaney and Littlejohn's Book 7 - Trees as a Theme -- I decided to try my hand at some sketching, just to see if I could get the 'feel' of the bark of these trees.

Working out the aging bark
Notes & sketches on a 'tree-like' watercolour wash
In the end, given my approaching deadline (July 31) I decided to work with the aging bark of the ornamental fruit tree.   The fungus on the Mountain Ash called to me to embroider it (buttonhole wheels came to mind, and French knots...) and I knew I didn't have the time...so will set that aside for another day.

Continuing on with Beaney and Littlejohn, I played with strips of fabric and paper to create a bark-like collage.  The paper I used wasn't plain -- it was an inkjet print of the photo above.  The method is this: lay down a piece of plastic bag -- either a kitchen trash bag or some other thick shopping bag (I used one from a shop).  Coat the surface with PVA (white all-purpose) glue (I used Home-Bond (R) White Glue), mixed with a bit of water.  Lay down your collage; let dry.  When dry, peel it carefully off the plastic bag.  You can now use it as a design or as a basis for stitching.  In the photo below, you can see the handle of the bag on the left, and the plastic shower curtain remnant protecting the counter top on the right.


It worked very well and I am of a mind to simply bond it to a base fabric, sandwich it and quilt! LOL!  I may very well do that, but for the moment, I've continued to test techniques.

On to transfer paints.  I must say I've had mixed feelings about the results here.  It could be the colour palette, which has to date been limited by the sample sizes I bought, thinking I could blend them to get what I wanted.  I have found this is trickier than I thought it would be, and often my results -- when they show up -- are either muddy or all a very brilliant green (not one of the colours used but a melange!)

I have, however, determined which of the fabrics in my stash are best suited for this work thus far -- that is, which white ones are the "most" synthetic and therefore happier accepting the paints.  I have also returned to the transfer crayons I bought some years ago, and found they work much better altogether...so I may just go with them for the time being.

Supplies and Resources

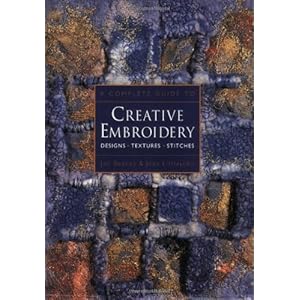
My teachers for this work have been Beaney and Littlejohn with their Book 4, Transfer to Transform, and their book Creative Embroidery: Designs, Textures, Stitches -- specifically the section on fabric paints.


My initial forays brought results like this, which I thought might work as a background for hand-stitching, working out a rock garden theme:


And this, which I thought very pretty, calling for stitch and perhaps beading...


It all begins with papers painted with the transfer paints.  Once the paint is dry, you place it face down on your piece of synthetic fabric, and press the heck out of it with a dry iron.  It is a work out for your arms, applying even, slow, steady pressure.


I did more of the same yesterday, with mixed results.   Nothing dark enough to use in a collage-like piece for tree bark texture.

Undaunted, I turned back to my embellisher.  I first opened the box on this baby a week or so ago, and created some "cloud" samples with coloured wool bat and white merino fleece on a large piece of blue upholstery fabric.  The tweedy looking bit under the white 'clouds' is a strip of recycled acrylic sweater fabric, felted onto the blue background, like hills in a mythical landscape.


Fun, but could I felt the wool bat on its own without adhering it to fabric?  Turns out I could.  The flat bit you see on the right (vertical) is felted; the top part (horizontal) is not.


From this felted bat I cut a couple of shapes, felted some white bat, and then felted the shapes into the white bat:


Also cute, but how will this help me with my 'texture' piece?  Well...for one thing, it gave me practice using the embellisher to create different textures. For another, once I felted a thin piece of white bat, I decided to dip it into some dye to create a piece I could then slice up and insert into or apply to my 'texture' piece.  Here it is drying out back yesterday afternoon:

The Golden Fleece!  ;-)
The nature of this bat is such that it is thick and thin, which I think gives it scope for different uses in a piece.

This afternoon's adventure?  Using my burning tool on strips of synthetic velvet...

Because I'm out of the studio the next couple of days, I'm hooking this up early to WIP Wednesday at The Needle and Thread Network.  See you later!

Saturday, June 08, 2013

I'm So Excited

I can hardly stand m'self!  It's been quite a weekend -- and it's not over yet.  :-)

I don't have many photos from the Edmonton Festival of Quilts and those I have...I can't share online.  :-(  However, it was a grand show -- 300 pieces, not counting the special exhibits such as the Primrose Quilt Challenge (miniatures with the theme, "I've Been Everywhere") and the charity quilts and the "Bees".  Yes...the Edmonton Guild has a number of small groups (bees) within its purview, catering to quilters who want to meet in small groups and explore various techniques, such as applique, surface design, making bags from scraps, etc.  Great fun!

The venue was, in reality, far too small for the ambitious displays and vendors.  Parking was a nightmare because the women (quilters) were vying for space with the men (ball tournament players)...and there was also a wedding at a church nearby, so that parking lot was unavailable.  Whoa!!

Blessedly, everyone took it in stride (we are, after all, Canadian) and lined up and parked nicely and walked whatever distance necessary... It was good for us, after all, and it was a nice day! (Forecast showers held off, thank goodness!)

I made two passes through the exhibit halls...including vendors...with a break for a bite to eat in between.  Ran into some art quilt friends, saw the work of many others, and more.  Found my favourite vendor -- Copperfields Books -- which had been missing in Red Deer in April (the dear fellow made it to RD and came down with the flu and spent his weekend in the hotel room!!).  Made a purchase and solicited him to look for the latest Double Trouble DVD for his inventory.  Yeah!  I await news...

Eventually, mind overflowing, I made my way back to my car...and south to...Central Sewing.  This is where the excitement builds -- trust me!

It's their anniversary, and they've been having BIG sales for several months now.

And I've been pondering an 'embellisher' for 3 years now.

Today...their sale prices caught up with my dream.

I am now the proud owner of a Baby Lock Embellisher -- 12 needles, thread port, stand for thread/balls of yarn...

Be still, my heart!  I have landscapes forming pictures in my head.  Miniatures.  Felted backgrounds.  Uses for the merino fleece and wool felt batt and on and on and on.  I'm tempted to take "Summer School" into a fall semester...and hope that I come out in January with the start of an inventory enough for the next Lacombe Art Show and Sale!

This is what happens when you're a knitter (age 8) who learned to embroider (age 10) and later to quilt (forties) and spin (fifties)...

Eventually the fibre and floss catch up with each other and become...fabric!

Oh...and then a pit-stop (for over an hour) at River City Yarns (South), in order to spend some of the gift cards my kids gave me for Mother's Day.  Again -- WHOA!  I really wanted a Namaste bag, but their inventory had small ones...and large ones...but nothing that was 'just right' (with apologies to Goldilocks).

So...I went for a book featuring free-form knitting that I've been wanting to play with (Freeform: Serendipitous Design Techniques for Knitting & Crochet -- 2nd Edition -- by Prudence Mapstone)...and a roll of Sulky 'Sticky Fabri-Solvy' to add to my fabric-creating play inventory.  Believe it or not, these two items took 3/4 of the gift card funds...so just a wee bit left over for another visit...but LOTS of play time in between!

Thanks to my kids and my friends for a wonder-filled weekend!

Stay tuned...