Showing posts with label alterations. Show all posts

Saturday, February 23, 2013

Can This Project Be Saved? - Part II

The camisole is almost dry now -- dry enough to hang up without stretching, so it'll finish drying on a hanger on my shower rod.  I want to thank Kitchener Quilter for her suggestion to alter it through the back rather than risk putting the front section out of alignment.  The thought had crossed my mind but because of the amount of fabric involved -- six inches! -- I hesitated.  In the end I may compromise and alter three or four inches in the back and 1 or 1 1/2 inches on each side.  We shall see.  We shall see.

Meanwhile, there was another project that wanted alteration.  Remember THIS?  Now re-named "Mountain Fantasy" -- because the piece is purely out of my imagination -- here's what it looked like when I last posted about it:


Since then I trimmed it, and began to embroider flowers in the "grass" at the bottom.  I started with a clear red, implying...poppies, or something:


Then I let the piece sit for some weeks, while I worked on THIS and THESE.  I seemed to have lost my momentum; I couldn't get enthused about returning to the piece, but I knew I had to if it were going to be part of my collection at the Lacombe Art Show & Sale in April.

On Wednesday I dug it out and took it to my friend C's, for a bit of hand-stitching time.  I added more running stitch to secure the tiny trees; I didn't touch the flowers till that evening -- and again, it was without enthusiasm.  The red just seemed to be a bit much.  I kept going, consoling myself with the fact that yellow French knots and violet 'stars' would tone down the red.

Thursday I was out of town.

I awoke early yesterday, with a start.  I knew exactly what was wrong with this piece:

  • It was out of proportion; there was too much water; and
  • Those flowers had to go!

I began with the water fabric.  Pinning and auditioning, I took about an inch out of the centre.  Yes; that would do.  I took out the quilting in a band almost 2" wide across the centre of the water fabric.  Having done that, I was able to separate the spray-based blue fabric and foundation fabric from the batting.

I cut the fabric from side to side:


I cut the batting across the back:


Then I cut the piece in two:


I trimmed out the superfluous fabric on the front and batting on the back.  Then, starting on the back, I used a close whip-stitch to attach the batting pieces back together.  In the photo below, you can see excess backing fabric -- bereft of batting -- folded back.
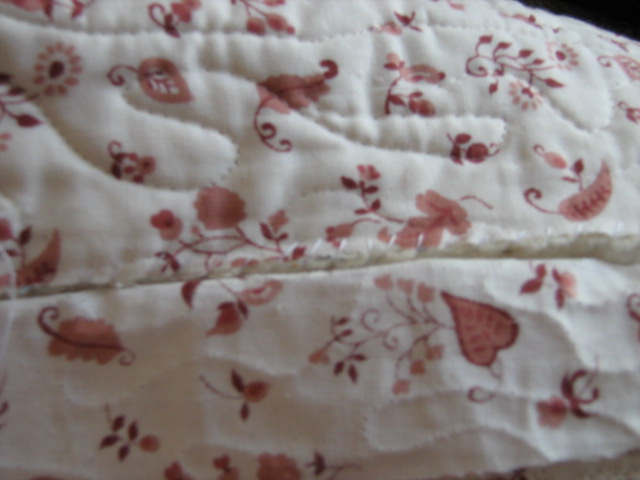


I trimmed the excess fabric, folded over the edge, pinned it down and stitched a blind hem across the back:


On the front, I trimmed away foundation fabric to reduce bulk; then I folded the edge of the water fabric and pinned it in place.  The plan was to quilt it all down.


And so it was.  I finished the afternoon by removing those darned flowers -- and deciding not to put in any at all.  I like the proportions much better, too.


Today: facing, and a label, and a sleeve.  Phew!  That was a close call.

Friday, February 22, 2013

Can This Project Be Saved? - Part I

"One step forward; two steps back."  It's been a bit that way this week.  I wanted to spend more time knitting, and I did...with mixed results.  I got the heel flap finished on a sock, the pattern for which I'm not enjoying too much but haven't the time or inclination to take it out and do something else.  And in the UFO department, I did finish the camisole...in a manner of speaking.


There she lies, drying out after been washed and blocked.  Pretty, yes -- but I intended it for me and it's six inches too big around!

How did this happen?  I've been knitting for years.  Was the gauge off?  Well...perhaps.  I wasn't using the yarn called for in the pattern but, I thought, something simlarly luxurious.  The piece is knit in the round on a circular needle.  When you divide for the front shaping, you go back and forth for each section, leaving the rest on the needle till you're ready for it.

  • On the ball band, it reads: "22 sts = 10 cm (4") on 4 mm (US 6) needles.  That's 5.5 stitches per inch.  
  • In the pattern it reads: "24 sts and 26 rows = 4" on the needles called for -- 4.5 mm or US 7.  In other words, 6 stitches per inch -- just a tad finer.
  • Using a 4.5 mm  circular needle, I managed to get 5.25 stitches to the inch.
  • I selected my size and then reduced the number of stitches very slightly across the back, because my real bust measurement lay half-way between two sizes.
Hmmph.  It's still damp, so I won't be able to fiddle with it for a while, but I'm thinking seriously of taking it in 3" on each side by sewing a seam down each side at the desired width, trimming away the excess and finishing the edges to prevent ravelling.  

Before I do so, I'll make sure I have a stiff drink!

What do  you think?