Showing posts with label Orca Bay Mystery Quilt. Show all posts

Monday, February 06, 2012

Kinda Neat...

That my quilty associate, Cathy, and I seem to be on the computer -- reading and posting -- at just about the same time every day.  That makes me smile!

She -- and her work -- has been just one of the people I've gotten to know a bit (better) via the Orca Bay Mystery Quilt project and its regular Monday link-ups.  Today is the final link-up, and it's fun to see what the other quilters have done with their tops (or TIPs -- Tops In Progress)!  It's also inspiring and interesting to see what others have done to interpret the pattern via colour(s), or the border(s).  I stuck to the black-white-blue-red combo because I love those colours and have (yes...still have) a good amount of them in my fabric stash and scraps.  However, I did do a couple of wee things with the borders: I used black (instead of white) for the inner border, and I inserted my left-over blue strippy squares into the top and bottom borders instead of making more quarter-square triangles to fit.

Now the top is resting until I can a) finish cleaning up my studio from the explosion of scraps generated during the project; b) figure out what I have on hand for backing and batting; and c) finish taking my online class on "Quilting Big Projects on a Small Machine", taught by Ann Petersen over at Craftsy.com. (Totally worth the price of admission -- and it's currently being offered at a discount! And no, they didn't pay me to mention this!)

In addition to studio sorting, I have continued to stitch.  :-)  Once again it's time to post my block for the Crazy Quilt Project and TAST Week 5 -- Herringbone Stitch.  Unlike the stitch for Week 4, I really enjoyed this one.    The tie I managed to pick from my stash (remember, I dig into that drawer with my eyes closed.  Honest.) was a pretty one, too.  Here's the block and a couple of detail photos:

CQJP - February 2012

Detail 1

Detail 2

Now I must dash -- it's Monday, and I'm due to spend the rest of the day (as usual) in Lacombe.  Have a good one!

Wednesday, February 01, 2012

Finished Top!

Yes, Gentle Readers, the top of my Orca Bay Mystery Quilt is finished!

Full out on my kitchen floor!

Corner detail

Centre (on each of 2 sides) detail

I confess I have no idea when I'm going to sandwich and quilt it, but it won't be soon.  :-)  I need to take a break from this project, figure out what I have on hand for backing, and check my batting supply.  I think, as Bonnie did, the quilting will be an overall pattern -- likely in a neutral thread (I'm thinking white or pale grey) that will blend in and not detract from the piecing which, if I may so myself, has completely floored me with its success.  Will I do another top with as many pieces any time soon?  Not on your life!  However, I have become a rabid scrappy quilter, so there will be more tops churned out.  As for the leftover 'crumbs' -- I'll be converting those into art pieces with fusing and tulle for free-motion quilting practice...

Tuesday, January 31, 2012

That's *Cretan* -- NOT 'Cretin'!

Or is it?!  Gosh, I had trouble with the Cretan stitch for TAST Week 4!

In the end, I persevered -- with not one, not two but all three stitch reference books open at one time or another.  I managed to get the hang of the 'closed Cretan' far more easily than the open version.  I even tried "Raised Cretan".  Sigh.  In the end I tried to unify the sampler with flowers and beads, repeated in the lace trim at the bottom.  I added a spider too; can you see him?  I don't like spiders much, and don't like this block much.  Seeing as spiders are popular embellishments for crazy quilt blocks, I decided he and this block deserved each other!

Week Five begins today with Herringbone stitch, which I much prefer.  :-)

In the Orca Bay, the inner borders are on, and pieced borders have been sewn to each side.  Here's a peek at how it's shaping up.  What amazes me is that the pieced border fit exactly.  Wow.  How'd I manage that?!


Friday, January 20, 2012

Friday Finishing

I finished three things this week:

  • a pair of socks for myself that have been on the needles since 2009 (blush);
  • the Veil of Rosebuds socks for my daughter's friend; and this afternoon...
Tat-ta-ta-da!  The centre of the Orca Bay Mystery Quilt top!

Here it is on my kitchen floor.  I had to move the table and chairs in order to spread it out!  It measures 66" wide by 74.5" long -- taken through the middle of each side, as you're supposed to do.  Now for the borders...


Sunday, January 15, 2012

Reminding Us It's Winter

January arrived for real some time last night, with snow and blowing snow, temps of -22C with a wind chill of -31C.   My furry companion, Diesel, knows exactly how to deal with this weather: turn one's back on it and catch a few z-z-z-z-z s.

Blanket Buttonhole Stitch Block - TAST Week 2
Me? I've been in the Sewing Studio.  Last evening I set my mind to this week's Crazy Quilt Block for TAST, and this morning, while listening to the podcast at Nonnie's Quilting Dreams, I finished it.  I had great fun with this piece, and got a bit carried away with the beads.  My in-line blanket buttonhole stitch is quite good, but it proved a challenge to use it for couching and on velour.  And yes...my 'wheels' need work if I am to do them on fabric that's not specifically laid out for embroidery (silk is quite different than aida cloth or even-weave linen!)

Then, with Peter Tongni and CBC 2's Choral Concert as accompaniment, I headed to my sewing machine and made up a couple more rows on the Orca Bay Mystery Quilt top.  So large that it now fills my design wall, hanging down to the floor, I've decided to make a separate unit of the last 8 rows.  I'll attach it to the first 9 once I'm finished.  Measuring for the borders will be tricky -- I'll have to move furniture to lay it out on the kitchen floor!  This is not the largest quilt I've ever made, but I lived in a larger house the last time I did something like this...

Certainly this top has more pieces than any I've ever created, and will have to be very densely quilted to deal with the bulk of all those seams and junctions!

What's in the plan for this afternoon?  As it continues to blow, I'm staying warm with The Quilt Show, (always lots to see on that site!), perhaps an episode of Antiques Road Show, my knitting...and maybe -- just maybe -- I'll curl up with Diesel.  Stay warm!

Wednesday, January 11, 2012

WIP Wednesday

is brought to you by the letters O-B-M-Q, T-A-S-T, C-Q-J-P and C&G, and the decade, 1970.

Steadily, my Orca Bay Mystery Quilt top is growing, at the rate of two rows a day... At this point, I've had to rotate it so I can still pin it up on my small (4' wide by 2' deep) design wall, so if you want to see what it really looks like, rotate it 90 degrees to the left!  ;-)

Take A Stitch Tuesday this week features one of my favourite stitches -- the blanket buttonhole stitch.  It's a great little stitch for embroidery and embellishment, as well as for applique with a 'country' feel to it.  I've made a start on my second Crazy Quilt Journal Project block (you may recall I've found myself doing one weekly to match the TAST challenge, despite the fact that the CQJP is a monthly affair), as you see here:

Isn't that a funky block?  The print is from one necktie; the solid orange-y bits are from the lining of another; and the gold is some dupioni silk I've had in my stash for a while.  Taken together, it reminds me of the kitchen floor in our first house, circa 1977...

Meanwhile,for the City & Guilds online class, I've been stamping around my work room.  You  might recall from this post that I've been working on designing a quilt block, and that, clearly, creating a skewed pattern from these shapes would be complex, requiring paper piecing or templates.

Before going down that road, we students were asked to think about creating patterned pieces using paint and stamps.  At the start of the program we were given a kit that included a piece of sticky-backed foam.  Now we had to dig out our foam pieces and create stamps with our chosen designs.  Mine is the skewed Windmill, and my stamps look like this.

First I did some samples on white paper and in my sketchbook.  This is a stamp using the 'positive' of the print:


This sample shows the 'negative':


Next, I did a sample or two on paint-washed paper.


From there, I moved to stamping with acrylic paint -- diluted slightly with textile medium, to make it easier to stitch -- on hand-dyed fabric:


 This one's a bit messy; the stamp bits didn't fill the block on which they were mounted, so some of that picked up paint from the brayer with which I was applying it...
This one is much neater because the stamp bits filled the block on which they were mounted.  Ah well, live and learn.

The next assignment will be to plan and execute the quilting, either by hand or by machine.  Stay tuned!


Tuesday, January 10, 2012

Still Sailing...

on Orca Bay -- but getting ever closer to the shore.  Just a quick snapshot of where I am with the assembly of this top.  My design wall is only 4 feet wide by 2 feet deep, so I'm getting to the point where I'll have to hang it sideways to view 'next steps'.

This is a pretty lively top, however far away one stands from it, so I'm pretty sure I'll have to find a home for it away from its point of origin!  We shall see...

Thursday, January 05, 2012

Light Bulb Moment

Despite all my education, sometimes I'm just a wee bit slow to catch on.  Yesterday afternoon I ran in to my LQS to buy more neutral thread (white and off-white).  I've been going through quite a bit of this stuff since I began the OBMQ, and needed to stock up.

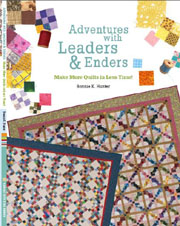
Now my LQS (Caroline's Homespun Seasons in Stettler -- just moved to a larger location, so no links in place yet; sorry) has a coffee/tea bar, so after I made my purchases I got a cuppa and sat on a comfy couch to look at a book on sale in the racks.  This one caught my eye because I recognized both the title and the name of the author.  Yes: it's Adventures with Leaders & Enders by Bonnie Hunter -- she of Orca Bay Mystery Quilt fame.

I'd heard of the book because my friend A has been raving about the technique for a year (two?) now.  I'd heard of Bonnie...well... because I've been following her blog and working on one of her designs since mid-November.

However, somehow, it took browsing through the pages to actually get it.  To suddenly completely understand what Bonnie's been driving at with all this talk about 'leaders' and 'enders'.  I've used 'em for years -- but never called them that.  Whoever showed me the trick with L&E referred to them as "piggers", and that's how I've always known them -- till yesterday, when I learned that if you use scrap squares to create Piggers With Purpose (aka 'leaders' and 'enders'), you can create useful tidbits that can eventually go into a quilt.

TA DA!  I present My First Twosies:


I have a baggie of 1 1/2" scrap squares which, by the time the OBMQ top is completed, will have created a full range of square-pairs, just waiting for a four-patch.  More stash cleared!

Side benefit:  I continue to improve my quarter-inch seams.  What's not to like?

To think I've been quilting for over 15 years and only just figured this out.  (Blush)

Unfolding the Mystery

Cathy was right.  She affirmed that once I began to sew the pieces together, the shouting of all those high-contrast colours would stop -- or at least, begin to quiet down.


Two rows sewn together is definitely calmer.


And three rows is calmer still.
I'm starting to like this quilt again!  :-)

Wednesday, January 04, 2012

A Full Start to the New Year (Long -- With Photos!)

For the past couple of days I've been fully involved with all things textile.  Where to begin?

First, with the OBMQ, which has (at least online) reached its Grand Finale with the revelation of Part 8 on New Year's Day.  Where am I with it?  Well...as of last night (10 p.m.), I'd finished the rectangles, and put a couple of blocks up on my design wall to see how they looked.  My first reaction: Ouch! Noisy!


However, after a good night's sleep, they looked a bit better, and I decided to assemble the first couple of rows to see...and yes, indeed, there is potential!  Row 1 (all blue squares and rectangle units) is now lining the top of my design wall, and part of row two (all rectangles and Ohio Star blocks) is lying underneath it.  Clearly this assembly is going to be something I do slowly and gently, taking great care that the units match and fit together properly.  So far, so good, so stay tuned!

Next, in the Knitting Department, I've turned the heel on the first Veil of Rosebuds sock and have made my way down the foot by a couple of inches (24 pattern rows).  I confess I had my doubts about this heel at first, but now that its finished I can say it's definitely going to be one I try again.  It may not prove as sturdy as my standard 'Dutch heel', but I like how neatly it finishes without any additional fussing over picking up stitches along a flap, and creating a long gusset.  Pretty, isn't it?

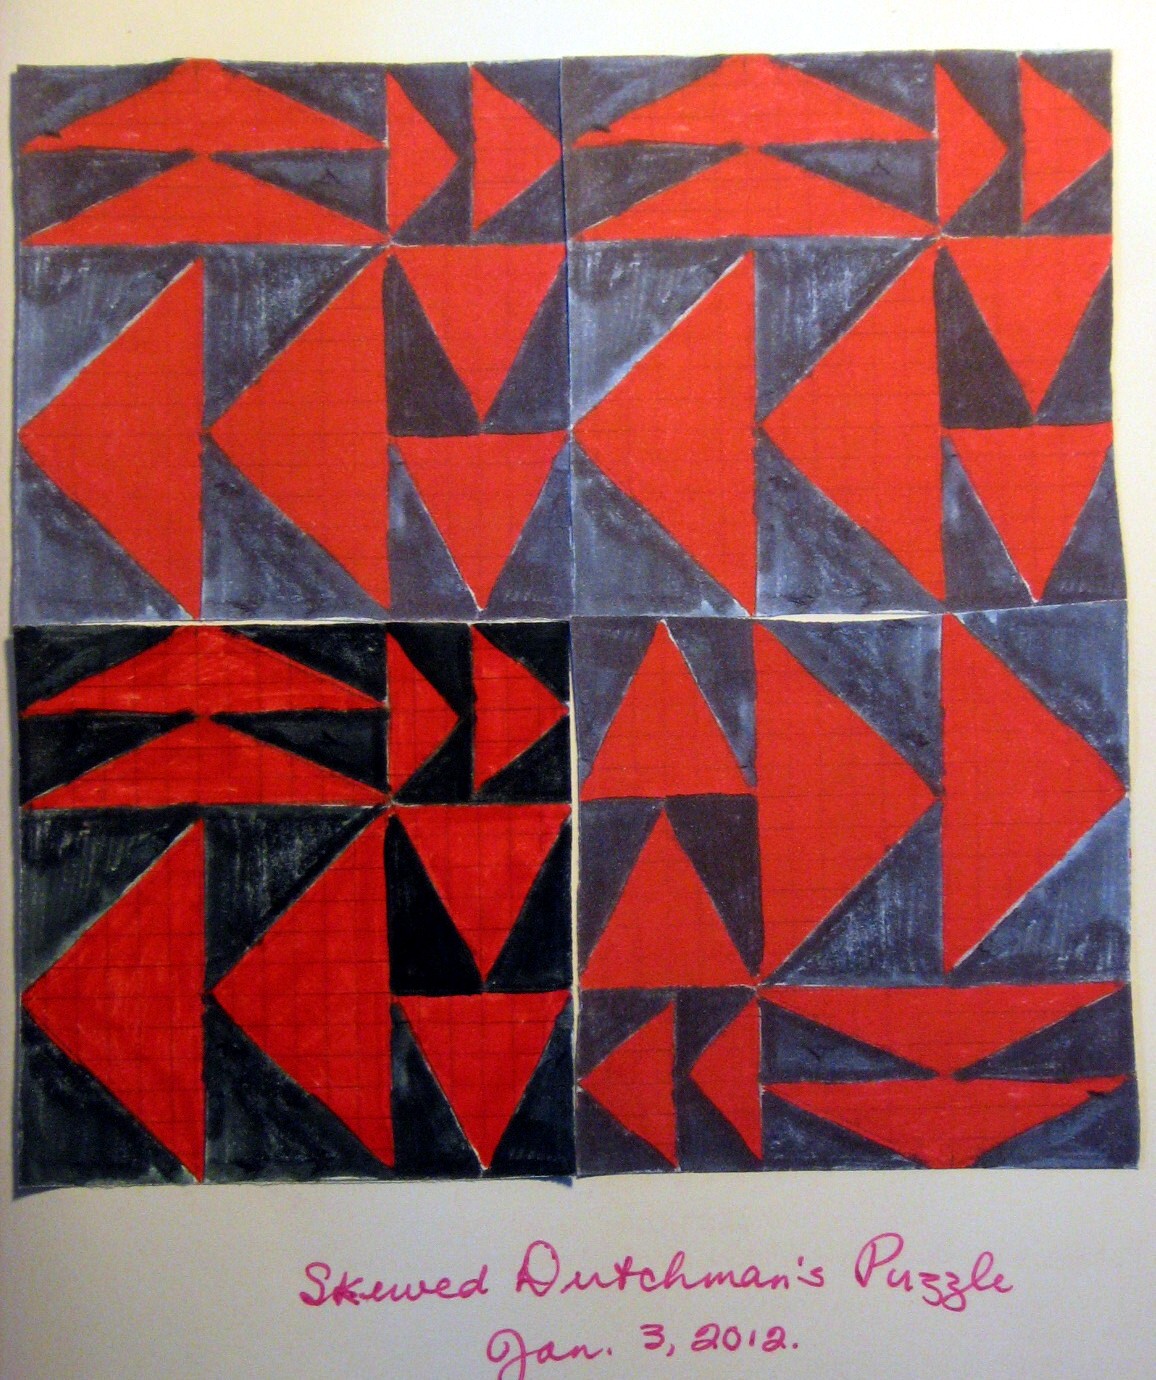
On into the C&G Classroom -- where I've just completed Activities 5 and 6 of Module 5.  I am now in the throes of all things pieced.  Activity 5 was simple: identify the type of basic block used in an illustrated star block pattern (I assessed that it was a four-patch).  Activity 6, though, was more extensive: research some quilt blocks and pick three favourites; document their origins (or what you can find out about 'em); draw them on graph paper -- and then draw them again, skewed. Finally, colour them in and create 3-4 copies; then arrange the copies in some sort of design.

Just picking blocks was the first dilemma -- there are so many to choose from, especially if, like me, you are a long-time fan of Quilt Blocks Galore!, a resource simply overflowing with wonderful free quilt block patterns, most of which have a traditional, timeless origin.

After browsing for nearly an hour, I came to my sense and picked these three: a Basic Nine-Patch; a "Dutchman's Puzzle" (aka "Flying Dutchman" or "Windmill") and the trusty "Ohio Star" from the OBMQ (aka "Star", "Eastern Star", "Lone Star" or "Texas Star").

In recent months I've used the 'Disappearing Nine-Patch' that's been making the rounds.  I had great fun with it earlier this year when I did up comfort quilts for Japan in the wake of the earthquake and tsunami.  This exercise, however, is different.  Rather than make an original block, slice it and re-arrange the pieces, I was asked to shift the original design lines of the block to create something different altogether.  Ditto for the 'Windmill' and the 'Star'.  See what I mean?  It gives this piecer an entirely new way to think about her blocks!

Lastly, I got myself caught up with TAST -- Take A Stitch Tuesday -- which I've joined for 2012, in combination with the Crazy Quilt Journal Project (CQJP).  The idea behind this is three-fold:

  • To have an opportunity to do hand embroidery, which I love but for which I don't make enough time;
  • To revisit the art of crazy quilting, thus improving my skills in this art form; and
  • To use up stash -- including a mountain of neckties I've acquired over time -- some from my late husband, and some from the local thrift shop, because they were too pretty to resist.
Just look how much fabric there can be in a single deconstructed necktie!  (The orange bits are lining.)

I began to prepare for this endeavour before Christmas, when I washed all the ties in my collection -- simply threw 'em into the washer and then into the drier, regardless of fabric content.  None of them disintegrated and (apparently) none of 'em shrank.  Amazing!

Diagram: stitching.com
Now TAST is weekly, and the CQJP is monthly.  My initial thought was to create one crazy quilt block per month (6" finished), with enough seams and space in which to incorporate the four or five Tuesday stitches in each given month.  The first stitch for the first Tuesday in this first month of 2012 is Fly Stitch.   In Sharon B's inimitable way, she illustrates a multitude of ways in which it can be used, so now I'm beginning to think I might try a block a week.  (In addition to giving me lots of space to explore the weekly stitch, it'll use up more neck ties!)

My first block uses fabric from two ties, plus a bit of velvet and another plain scrap to give myself some working space.  In this photo, you can see I've only just begun to build...

Now if you'll excuse me, I have some stitching to do...  :-)    See you later!


Saturday, December 31, 2011

Year End Post I

I have more than one idea for posts today, but each deserves its own 'page', so...here's the first: an Orca Bay Mystery Quilt update.

We had a bit of a snow-blow overnight here (more blow than snow); this morning the wind continues.  I've decided to postpone my planned run till this afternoon, when the wind is supposed to die down, and to stay indoors and sew.  I've put the Christmas Day Chicken carcass in the slow cooker with  onion, celery, carrots, parsley, sage, bay leaf and thyme, salt and pepper and water to cover...for tonight's dinner, and after I finish this post, I'm going to resume the OBMQ -- now ready for Part 7!

Yesterday evening I finished the last of the Ohio Stars from Part 6.  Here they are sitting in their tub, waiting for their part in this project.  The last 2 squares (1 white, 1 black), were definitely cobbled together from the last bits.  I'm just hoping that they'll work out alright in the end!


And here are the first few units for Part 7, ready to stitch:


The piecing together of these units has been a fascinating exercise in colour.  First, there was the selection of the black-and-white fabrics that could be read as 'black' versus the ones that could be read as 'white'.  Next, there was the selection of reds for the triangles -- and of blues in the Part 2 squares, which have yet to come back on stage for their next act.  To illustrate the effect in the Ohio Stars I took a few photos.  Here are a couple of the the white star blocks.  Notice the effect of mixing up the blacks, ans using some fabrics as black that could also be read as white:


And here's something similar going on with the black star squares -- one of which was photographed before it got sewn together.  Look carefully now; these ones look alike, but there's a subtle difference because i ran out of one of the black fabrics...See how it gives the block a different look?


This game entertained me the entire time I was putting these together.  It became quite addictive; I kept going, if only to see what sort of combination I could come up with next.

I need to get into the studio now and sew a bit.  Happy New Year to those readers who may already be celebrating -- and stay tuned!

Wednesday, December 28, 2011

Lest you think there's no knitting...

Picture from amazon.ca
Never fear!  Sock knitting proceeds apace, with the 'Veil of Rosebuds' pattern designed by Anne Hanson, from Clara Parkes' new book, given me by my daughter for Christmas.  Whoot!

Needless to say, I had to get started on a pair of socks right away, and this was the perfect choice for the Patons Kroy FX yarn I had in hand.  These are a gift, so I can't show too much -- despite the fact that the recipient (to my knowledge) never reads my blog.


However, I can tell you that the pattern is  24-rows, with every even row a simple K6, P1; these 24 rows are knit a total of three times, and I'm enjoying it so much that I'm already half-way through the second set of 24.  Pretty, no?

P.S.: In the OBMQ Part 6, I've now finished 26 blocks -- 13 in each colour way.  Here are the first 8, playing nicely on my design wall.  The challenge in these is to select quarter-square triangles that complement the black, white and red squares, making those centre squares pop and avoiding an arrangement that could be too 'busy'.

All this bodes well for the next few Activities in my C&G Module 5, as I've come to the part of the program that requires I design my own pieced block(s).  I'm to begin by researching a favourite block or blocks -- history, name(s), etc.  I've been reading Quilts and Other Bed Coverings in the Canadian Tradition by Ruth McKendry (now out of print, but available in the Parkland Regional Library system), and it's leading me in the direction in which I want to go.

Canadian quilting history is sparse.  I suspect that this is due primarily to the practical nature of quilts, which were made to keep bodies warm in our cold Canadian winters, rather than to be preserved as artifacts.  Secondarily, though, unlike our neighbours to the south, Canada hasn't devoted museum space solely to quilts; that is, it has no Canadian Quilt Museum.  Rather, any historic quilts and other textiles have formed part and parcel of broader displays in  museums coast to coast, and are shown in special exhibits from time to time, but not all together in one central location.

McKendry's research and writing attempted to rectify our lack of knowledge in this area, and I am enjoying it very much.  More to come as I finish my reading and begin to work on my C&G blocks.


Tuesday, December 27, 2011

OBMQ Progress

Yesterday I joined the BDSI.  Although I didn't sew the entire day, I did manage to get quite a bit accomplished, about which I'm very pleased.  So before I go back into the sewing studio for a post-BDSI session, let me bring you up to date:


1.  First, I finished these -- 350 triangles composed of HSTs and triangular 'wings', testing both my patience and my sewing precision.


2. Next I cut out these -- 2 1/2" squares for the centre-pieces of the 9-patch that is Part 6:  112 each in black and white/neutral; 56 in red.


3. Finally, I began to assemble these -- the sets of nine-patch blocks incorporating the fabric squares I'd just cut, and the QSTs from 'way back in Part 1  There will be, in the end, 28 of each type.  Here, you see my wee stacks of 4 each, which I finished last night before bed:.  

Between you, me and the fence post, these are the best star-involved nine-patch blocks I've ever done.  Look at those points!

Note to my art quilting friends: I've long maintained I became an art quilter because I was a sloppy traditional quilter (!), but now that I'm becoming more skilled as a traditional quilter, I think I'm bound to improve as an art quilter too, eh?  Stands to reason!


Friday, December 23, 2011

Looking forward...

    Orca Bay Assembly Line
To later this morning, when I try to finish as many of the OBMQ Step 5 triangles as I can before noon!


elann.com
Colour #3794 - "Wine"

To this afternoon, when I pick up that lovely extra ball of elann.com's 'Sonata Soft' and begin the final two dozen (or so) rows of The Christmas Sweater;


To this evening, when I watch Alistair Sim be transformed from Scrooge to saint in A Christmas Carol;


To tomorrow morning -- Christmas Eve! -- when I clean my house and change the beds in preparation for my children's arrival;


To tomorrow evening, when I join my trio and the congregation at St. Cyprian's Anglican Church, Lacombe, to welcome the Christ Child;

To Sunday morning -- Christmas Day! -- when I continue the celebration with my children, and we all look to see what Santa brought;

To Sunday afternoon, when we sit down to our festive meal;

To Sunday evening, after my son has left for home (5 hour drive and he works Monday), when my daughter and I spend time over the dishes and then relax in the living room;
Boxing Day Sew-In

To Monday -- Boxing Day! -- after my daughter's left for her home...and the house is quiet save the hum of my sewing machine...

So-o-o-o many blessings!