Showing posts with label Posh Poppies. Show all posts

Saturday, November 16, 2013

Finally!

A few finishes on a Friday...reported from my cozy nest on a Saturday morning, wind whipping snow around the corners of the house; fresh, hot coffee at my elbow.  Ah....!


First -- though there aren't photos (at present), there are now two (count' em!) "Mont Blanc" hats on display in the " Bravo Mezzo" exhibit at TCL -- one white with purple-blue stripes and one in the reverse colour-way.  

The PLUS is that there is yarn left over, which I've decided to turn into " Maine Morning Mitts" from Clara Parkes' Knitter's Book of Yarn.


And then..."Posh Poppies" is finished -- at least from this gal's point of view -- and ready to be returned to its owner for framing.  (Note that there is machine basting around the perimeter to identify the area intended to be framed -- per the pattern's measurements.)


The little white flowers were recycled from a piece of lace in my stash.  They aren't exactly what's called for.  The pattern required me to cut 2" squares from a piece of slinky faux satin, and to sew them, right sides together (!)...leaving a small hole for turning.  Once turned right-side out, I was to take a needle and thread and create a four-petal flower, like so:

UGG-LEE!
Definitely not my forte!

Is it any wonder I switched?  I tacked each one carefully with silk thread and then attached a number six black bead in each centre.  The pattern originally called for brown beads (no size given) -- but I thought the black picked up the black in the poppy centres to unify the piece better.

Applique floral detail

Beading detail

So.  I'm feeling quite pleased with the effect and hope my friend S who "commissioned" me to make it up for her is pleased too.  On to The Next Thing...

Aprons!  "Aprons?" you ask.  Yes.  The Mirror & District Museum is having its first-ever Christmas Open House and Tea on December 1, and I am making 3 long aprons for the servers (me and two other gals).  A king-sized flat white sheet from Value Village was purchased for the purpose, and yesterday (Friday) I put together the first one:


Simplicity Sewing Book
ca 1972
These are long aprons, meant to go over long skirts.  The fabric is thin and soft, befitting a used sheet...and the bottom hem was already in place.  I tore the fabric into 36" squares, gathered the top to 20" (or so) and added a 62" strip for the waistband and ties.  I had a little help with the measurements from a pattern I bought online: "Auntie Dot's Apron" from Jodi Nelson of Pleasant Home.  A few modifications (length, no pocket) -- et voila! 

Oh yes...and because I hadn't gathered much of anything in the way of a garment's waist since my daughter was small, I dug out my old Simplicity Sewing Book to make sure I remembered how to do it properly!

One down; two to go!

Last but not least...there is knitting.  In addition to shop samples, I'm doing a wee bit of knitting for Christmas.    Remember these mittens I began 'way back in August?  I finished the cuffs and let 'em sit for quite a while.  Well!  Yesterday I finished the left-hand mitten:

Topside
Underside
I just love the way this yarn performs!  I've made the entire mitten from the same ball, as well as the cuff for the right hand.  All that remains to be done is the right hand itself.   Here's my old hand modelling for you:


I won't say who these are for, except "not my daughter" (:-) ) 

And now to link up with Nina Marie's Off the Wall Friday, and drop on by to see what everyone else is up to!

Tuesday, November 12, 2013

Almost There!

"Posh Poppies" is getting closer to its completion.  It's a case of a fairly innocent-looking pattern turning out to be More Work than One Would Have at First Suspected. 

That said, I've been doing it as a favour to a long-time acquaintance, and as she's promised not to take orders for further versions of this piece, I am prepared to be generous in spirit when it is finally finished and she asks whether or not she owes me... (wink; grin!)   It's proved to be a good experience for me; I've honed existing skills and learned some new techniques, and now that it's almost finished, I'm glad I took it on.

After four (more) solid hours today, here's what it looks like...


and a couple of detail shots:

Bud #1, Poppy #1, Poppy #2
Poppy #3, Buds # 2 and #3
What's left?  Beading (at the tops of the stamens); a bit more shading (playing this by ear), and a series of wee off-white flowers that are scattered about the centre/right of centre of the piece.

Then I will baste the "to be framed" area so the recipient has an idea of how to communicate this with her chosen framer.

Meanwhile, I'm linking up with The Needle and Thread Network and hope you'll check out the other participants this week.

Have a good one!


Friday, November 08, 2013

Somehow It's Fitting

...that I should be working on this piece this weekend...

Posh Poppies - (C) Chi-Chi Quilt Designs

This afternoon, I'll be stitching on the skinny stems, tacking down portions of leaves that had to be re-positioned, and layering the piece with batting only for some gentle shadow quilting around those leaves and stems.  The piece is going to be framed by the owner, rather than hung as a quilt, so the batting will be very thin.

After the quilting, the poppy blossoms and buds will be attached.  This includes thread painting and beading on the blossoms for stamens and pistils.  Then tiny off-white sateen flowers will be scattered about on the right side of centre, attached by hand, and the piece will be finished.

While I link up to Nina Marie's Off-the-wall Friday...

Have yourselves a peaceful weekend...
and take time
to
remember...


Wednesday, November 06, 2013

A Bit of This...

And a bit of that for a Wednesday full of WIPs.   Now that The Door Quilt (aka "Forever Blessed") is finished, I'm tackling what's next on the list.

First up was my piece for the October-November 15 x 15 challenge, "Connected" (or "Connection" or "Connecting" or variations on that word).   I've been thinking about it since the middle of September.  I began eagerly with two or three different ideas, but they all seemed to fall flat.  Pardon the pun, but I couldn't seem to "connect" to the theme.

The one notion that stuck with me the most is the fact that the members of our group, while international in scope and diverse in age, talent, skill and style, are all connected through cloth.  I thought about how women like us have used fibre to make connections down through generations -- spinning and weaving first, I think, and then knitting yarn or felting roving into fabric.  Connecting layers of fabric with stitch to make quilts and/or garments, and then carrying it further to embellish those garments.

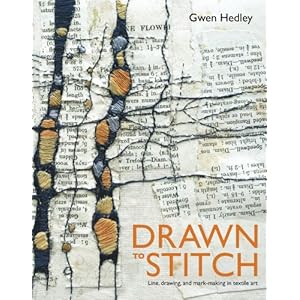
In the end I constructed something with a weaving technique I picked up in the first chapter of Drawn to Stitch by Gwen Hedley -- the chapter about constructing backgrounds, including weaving a background.  Instead of sheets of fabric, though, I fused 5" charm squares to a muslin ground -- 15 in shades of yellow to deep red on one piece, and 15 in shades of blue on another.  Each piece is thus 15" square -- no seam allowance!

Fusible web was applied to the back of each block; then the blocks were sliced in curvy lines, and woven together on a very light-weight background (I used some synthetic drapery fabric I had in my stash).

Here's a detail of how it looked as I began the quilting -- by hand, using hand-dyed perle cotton (#8) and a long, sturdy "carpet" or "doll" needle:


Once the stitching was finished -- at least, one set of rows -- I parked the piece on my design wall and there it sits.


I don't think I want to add any quilting in other direction; somehow it seems it would be too much.  And then there's the finishing.  Already 15" square (remember, no seam allowance due to the nature of the 5" charm squares and no sashing), I can't envelope it.  Folding over the edges 1/4" all the way 'round in the enveloping process would turn it into a 14 1/2" square piece; too small!  I don't want to complicate the piece by binding it -- and I have none of these coloured squares left.  I might dig around in my hand-dyes and do a narrow pieced binding...Or I might use a fairly wide satin stitch finish...It can percolate for a while, as there's plenty of other work to do, such as...

Shop Samples

I have a few samples to make for the shop, the first of which is a knit toque for Lori's "My Mountain" promotion of Schachenmayr yarns. While the yarns are bright and colourful, and a bit quirky (some have bits spun in that are fluorescent!), they're thick, and most of the patterns call for 8 mm needles and up.  Now most of you know I'm partial to socks, fingerless gloves, scarves and lighter-weight hats -- so the fact that I chose the "Mont Blanc Hat" as my contribution to the display won't surprise you.    It calls for a yarn the company calls "Boston"; our store substitute -- still by Schachenmayr -- is Bravo Mezzo, a chunky yarn that works to the same gauge.  I'm using white as the base colour but a brilliant purple instead of the red.  I think it's going to look very smart!

Next, as one of two embroiderers now working part time for the shop, I've been trying to expand our embroidery offerings.  We carry DMC floss in every colour under the sun, including some of the variegateds and some of the metallics etc.  Right now DMC has a holiday gift program -- with free patterns -- going in its online newsletter, to which I'm a long-time subscriber (long before I worked at TCL).  So...I thought it might be fun to create a couple of little samples to go with the free patterns and show our customers what could be done.

The first sample involves French knitting, also known as spool knitting or -- when I was a kid -- "corking".  However, it also involves embroidery floss instead of spun yarn...and metallic floss at that.  It's a necklace -- beaded if you wish, or embellished with a single stunning link or bead or whatever.  That said, I learned to do this when I was really young (5 or 6, I think) and had no trouble then... Could it be that difficult to pick up again after 55 years?


Yes; it could.  Two You Tube tutorials and a step-by-step written set of instructions (with photos) later...I finally got the hang of it using some plain DMC cotton floss (Colour #3756 - "Pale Bay Blue", if you're curious).  But translating this to slippery metallic yarn (I'd selected the beautiful, silvery "Antique Effects" #E415 from the Light Effects collection) -- and adding beads (No. 6 size in a metallic black)?   It might happen -- but not quickly!


The second sample is easier to handle -- a tiny bag for "Hannukah Gelt"  that has a delightful embroidered menorah on one side.  The pattern calls for a pre-made 14-count Aida cloth bag, which we don't carry, but which is easily constructed.  Here's the one I made this morning, waiting for me to select the floss at the shop tomorrow.  What's neat about this project is that you could use it for any holiday, depending on how you decorate it.  I thought I'd put the menorah on one side and a Christmas tree on the other, just to show the possibilities.

That was enough sampling for one morning!

Back to Applique...

The WIP awaiting me this afternoon?  More poppy leaves!  Yes, I'll be doing some applique on the "Posh Poppies" piece as I aim to have it finished before year end, if not before Christmas.  While I stitch, I'll be checking out the posts for WIP Wednesday at The Needle and Thread Network.  Come along, eh?


Tuesday, October 15, 2013

WiP-ing Right Along

After a couple of "blue" days wherein I kept plugging along in the studio by sheer force of will (mine and the Good Lord's!), I seem to have surfaced into a groove.

I attribute that in part to a 2-hour jog yesterday which cleared my head in more ways than one.  And I attribute it in part to the fact that once you begin, and you see progress, you can't help but keep going!

Yesterday I quilted the red/blue panel from The Door Quilt, and appliqued the first couple of stems on "Posh Poppies".  Accomplishing those two things built up a head of steam that's carried over to today and will continue tomorrow.

As of about 1/2 hour ago, the first green panel of TDQ is quilted too:


I'd have started on the second green panel if I'd not run out of batting.  After quilting the first two panels, what remained was just a bit too narrow to work for the last one.  I could piece it but the nature of this piece is such that I don't want to.  Not a problem; the remnant will be used in other projects -- and there's no shortage of those!

And as of this morning, more leaves have been pinned to the background of "Posh Poppies", just in time for me to take it with me to work on tomorrow while my car has it's oil change/maintenance service/paint touch-up/winter tire installation (yes, you read that correctly!).  That work will take several hours (in part because of the painting), so this is the perfect project to take along:


That, and some knitting.  I have several pieces on the go, including yet another hat, a pair of finger-less mittens, a cardigan knit sideways in one piece, and a striped throw.  Methinks the hat and the cardigan will be on board in case I finish or get bored with the stems.

But for now?  The sun is shining and I'm over due for some exercise.  I leave you with a link to WIP Wednesday on The Needle and Thread Network, and these photos of autumn bliss...

Diesel (R) & Pookie (L) in the sunny sewing  room window


Hey!  What're you doing here?!


Wednesday, October 09, 2013

The Handwork Begins

"Posh Poppies" has become a Portable Project!  This afternoon I made the bias stems and began to lay them down on the background...to which they will be hand-stitched.

First I made the stems using my "Celtic Bias Bars" rather than my Clover Bias Tape maker.  No reason, except that (perhaps) it "felt" less "fiddly".  :-)

Then, per the instructions in the PP pattern, I drew the design out on a larger (wider) piece of recycled laminate using a Sharpie (R) permanent marker.  Using the clear plastic as a guide, I pinned two of the stems to the background with wee applique pins.  I played around for a while with the leaves, laying them into the design, but decided it was best to stitch down these first two stems before trying to add anything else to the lay out.

Maybe by Friday I'll have something finished to show you on this front.   Meanwhile, it means my sewing machine has been freed up for other projects!

Stems for poppies 1 and 2 layed down

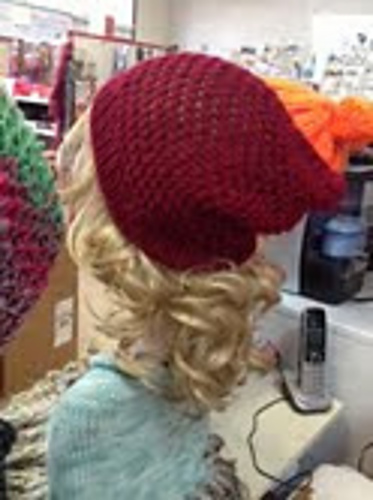
On the Finished Front, there is one thing: the second of the two hats commissioned by a customer from the shop was finished last week, and picked up earlier this week by said customer.  Here's what it looked like on a shop mannequin:

Swirly Slouch Hat by Lori Patterns
(C) 2013
The pattern is available on Ravelry.  Alas, the yarn selected by my client did not create a 'swirly' effect, which is best shown using self-striping yarn, such as something by Noro.  The yarn for the above had is Berroco's 'Remix' in the denim colour-way.  It works, but it's not exactly 'swirly'.  :-)

I like the pattern, even though the grafting of the back seam is a bit fiddly -- not nearly as easy as grafting sock toes!  I'm thinking there's one like it -- perhaps a bit more 'swirly' -- on my 'knit for Christmas' list.

This evening, though, both stitching and knitting are being set aside in favour of a cuppa dark roast and a cozy mystery.  See ya!

Wednesday, October 02, 2013

Under Construction

There's been a good deal of building going on around here the past couple of days.  It started yesterday, when I had a hankering to get back to work on "Posh Poppies", the pattern and fabric provided me by my long-ago quilting friend, S.

Remember?  S. bought the materials and then panicked when the first instructions she read in the pattern were for painting the background fabric.  I wrote about doing just that, 'way back in mid-August during my Self-directed Summer School (scroll down).

Well.  I'd not only painted the fabric but drew and cut out the templates for the flowers, centres and buds.  I was ready to roll!  Or...so I thought.

Getting into it again yesterday, I discovered the Next Tricky Thing about this pattern: it's not simple applique.  Appearances on the cover of the pattern are deceiving.  It's not fused applique.  It's not even needle-turn applique.  Uh-uh.

It's three-dimensional applique.

That is, the blossoms and buds are all two sided.  I knew the small white flowers were 3-D, because I'd seen a sample wherein they were done in silk ribbon and sewn on.  I'm talking about the poppy flowers themselves.

Even the tips of the leaves are two sided.  The bodies of the leaves and the flower stems are needle-turn, for which I should be grateful, but the blossoms are attached only by the thread painting that decorates them. The buds and stems are two-sided, with the latter being cut on the bias and sewn into tubes that are then turned.   

I tried my hand at a portion of the top poppy (#1 in the pattern), which is constructed by tracing the template -- right-side down -- onto the reverse of the fabric and cutting it out with 1/2" all the way around.  This is then placed, right sides together, on a second piece of the same fabric and they are sewn together on the tracing line using a smaller-than-usual machine stitch (I used 1.5 instead of my machine's default of 2.5 for straight stitching).  The edges are trimmed to 1/4" and you snip deeply into all the corners.  Then you make a 1" slit in the "back" of the flower and turn it carefully right side out.

Oy vey.

I learned the following from my first attempt:

  • Trim the seams to less than 1/4: if you can but be careful when you're poking the edges out with your turning device (I use a "Purple Thang");
  • Clip all curved edges;
  • Use red thread in top and bobbin; any other colour will show through the seams.
  • I can't tell which is considered the "back" of the flower because it's already been reversed twice (template 'wrong-side' down on the 'wrong' side of the fabric.
On my second attempt -- which I postponed till this morning! -- I still got the petal section reversed, but decided it was a flower; it could cope.  Here are two petal sections and the centre of Poppy #1, lying on the painted background, just to get an idea of what it might look like.  It looks well in the photo but "up close and personal"?  Well...maybe after I add some stitching...

"Posh Poppies" first blossom attempt!
And some people think creating an original design is tough.   Not compared to following Someone Else's Instructions! LOL!

While I was in the mood for SEI, I made the October block for the "Cinnamon" Block of the Month series I've been doing since January -- designed to finish a top from the first of three BOMs I bought years ago at the now-retired Freckles Quilt Shoppe in Calgary.

"Chicago Pavements"

In addition to this 'finish', there was one in the knitting department -- a second hat that had been commissioned by a non-knitting customer at the shop.  It's now washed and has been laid flat to dry.  It looks rather nondescript right now:

Swirly Slouch Hat - (C) Lori Nowochin, 2013

But here's how the first one looked on a mannequin in the shop:


And last but not least...

Our parish's Annual Fall Dinner is tomorrow night, and as usual, I've made a couple of pies.  This year I had more rhubarb than anything else, so I made these Rhubarb Crumble pies this morning:


Sorry if the photo makes you a bit queasy; I'd rotated it in my photo program, but clearly something got lost in translation to cyberspace!!

Linking up to WIP Wednesday on The Needle and Thread Network before I head out for a jog, now that the rain has stopped.

What are you building today?


Wednesday, August 14, 2013

Summer School 2013 -- Part IV: Playing with Paint

The weather this week's been glorious, so I've been spending a good part of each day outside on my back stoop, playing with textile paints, and sampling for at least two projects.

The theme of 15 x 15's next challenge is "Time", and I've been toying with the quote, "To everything there is a season", from Ecclesiastes 3:1 and onward.  In keeping with my love of trees -- especially aspen -- I had in mind to do a piece that shows a single branch through the four seasons.  I managed to find a small piece with leaves in the woods where I take my regular constitutionals, and brought it home with me to study (no trees were harmed in the making of these samples!)

I filled several pages in my sketchbook with sketches and rubbings, and even took a photocopy of the branch, seen at left below:

(L) - (R): photocopy in sketchbook,
traced outline of photocopy,
thread sketch on quilt sandwich, black on white
First I made several quilted samples -- the black thread serving as my 'ink' drawing against a white background.

Then I played with different sources of textile paints to colour in the branch and the background.  My vision was to have the background move from white (or very very pale blue) of a wintry sky to deeper blue of an autumn sky, such as I see here where I live in Central Alberta.

For the first sample I used Derwent InkTense Pencils, of which I have only six: green, yellow, red, purple, black and blue.  This meant I turned to my supply of General's Kimberly watercolour pencils (which I usually use with paper) for brown.  :-)


I liked the effect for the leaves and stem but using the edge of the blue pencil on an already quilt-sandwiched piece didn't bring smooth results for the sky.

For the second, I moved to my new Tsukineko mini-workstation's supply of all-purpose inks and "Fantastix" applicators.  I bought this through Quilting Arts when they were having a sale.  I ordered the "Back to Basics" set but was sent the "Colors in Bloom" set by mistake -- a mistake that QA discovered before I did, and for which they offered a further discount off my purchase.  I went with it -- I can always buy more colours if I so choose!  :-)


Another limited palette, so help was needed from my textile paint and a bit of acrylic mixed with textile medium.  I liked the control of the flow of the 'Fantastix' and got a smoother result on the background, but still not quite what I wanted.

I knew I needed to blend colours to get different shades for the leaves, as my supply of pencils and inks limited me to a real spring green.  So...for the third sample I turned to a combination of Jacquard Textile Paints and acrylic craft paint, mixed with a teeny bit of Jo Sonja's Textile Medium to give it more fluidity and a better 'hand' for stitching:


I liked the over-all results of this sample better -- including the shading in the sky.

I decided to apply what I knew about the shading to make samples for the other project on which I'm working: the completion of a hanging, made from a pattern, for a quilting acquaintance.

The kit features poppies, which she really loves;  when she saw it made up she bought it, and a variety of fabrics with which to complete it.  Getting it home, she began to read the instructions -- and therein lies the rub.  Right off the bat, the pattern called for painting some shading along the bottom and up one side of the background fabric.  She panicked and put it away -- until she ran into me at the Central Alberta quilt show in early April.

The pattern is designed in Canada and available through Quilters Haven in Moose Jaw, which had a booth at the show, so we were able to see samples in both red and blue "up close and personal".  I volunteered to take it on for her, and she delivered it to me one afternoon in July, when she and some quilting friends made a day trip to Lacombe and met me there.  She's chosen the red version, and with the selection of fabrics she's given me, I'm sure it will turn out well.

The background is already subtly patterned -- its a pastel green from the 'Fossil Fern' collection by Benartex.  Judging from the Benartex colour chart for this line, I think it's the "Silver Sage" colour way.  I wondered what adding a 'black-green' wash (per the pattern) would add to it.  Fortunately, I had enough of the fabric that I could lop off a couple of small pieces for samples.  Having already played with graduating the shades in a background (above), I suspected it would work best if the fabric were quite wet -- and flat (without the batting!!)

Sparing you the photos of the samples, here's how the background has turned out:


It looks even more subtle in reality, and the placement of the flowers and leaves of the pattern will make all the difference.

So...back to "To Everything..."...and the creation of a painted background before adding the thread sketch.  Here's the small sample, painted with diluted Jacquard Textile Color in "Sky Blue" (what else?!): 


Still rather intense, but the sample is 1/2 the size of the finished piece.  What would it look like with the branch stitched on it?  Going for the gusto, I included all 4 seasons...


...and I rather like it, but really, the sky is still too intense.

And then it hit me -- at 4: 30 a.m., of course, waking me from a sound sleep:

  • try Procion dye;
  • put it on very wet fabric;
  • use a pipette;
  • start at one corner and let it bleed downward.
There I was at 6 a.m. mixing dye, prepping fabric in soda ash (to get large enough pieces)...et voila!!  Subtlety and shading drying in the early sun.  


Now to carefully sketch on the branches...quilt and paint them, and the leaves...using...a combination of most of the above, of course!

Linking up to WIP Wednesday at The Needle and Thread Network, eh?  See you there!

P.S. In case you missed it, HERE's the blog post by Ali George re: my piece in the SAQA Trunk Show "C", on show Down Under right now.  Ali's been doing floor talks about it -- and a handful of others -- in the context of the full exhibit at several Australian venues.  It's very cool to "see" a piece through someone else's eyes.  I'm thrilled!